Homepage configuration
The homepage of your online shop is like the shopping window of a brick-and-mortar store. It is your opportunity to tell customers about who you are, what you sell, and what sets you apart from the competition.
The shop provides a pre-defined layout for the homepage. You provide the data to fill this layout.
Setup
Setting up the homepage consists of two parts:
- Enter information about your homepage in a category template. The shop uses this information to populate the page with your content.
- Link the homepage category to your shop's app configuration. This way, the shop knows which category template to use for the homepage.
Homepage category template
- Go to Item » Category.
- Create a new category.
- In the category, open the Template tab.
- Enter your homepage information as described in the Templates section. If you decide to use the recommended editor, copy your template by clicking on Copy > Copy formatted.
- Save the category.
Carry out steps 4 and 5 for every language your shop offers.
No additional category configuration
The shop only uses the template of the homepage category. You don't have to update any of the category's other settings.
App configuration
- Go to Shop » Management.
- Open the further actions menu (three dots).
- Click on Settings.
- Click on Online Store.
- In the Homepage section, determine the following:
- Pick your homepage category
- Activate or deactivate the newsletter sign-up form
- Save the settings.
- Build the application.
One-time build
As long as you don't change the homepage category, you don't have to rebuild the application to update the page contents. The page updates with any change you make to the category template.
Templates
The default homepage consists of four blocks:
- Hero banner
- Value proposition
- Featured categories
- Newsletter
Configure the first three blocks using the template below. You can activate or deactivate the newsletter block via the app configuration.
Our template uses a format called JSON. JSON is a data exchange format, where each entry consists of a name and a value. The homepage uses these name/value pairs to determine which content to render. The advantage of JSON is that it's both relatively easy to read and edit, and very flexible. This means it can support different homepage layouts.
Tool support
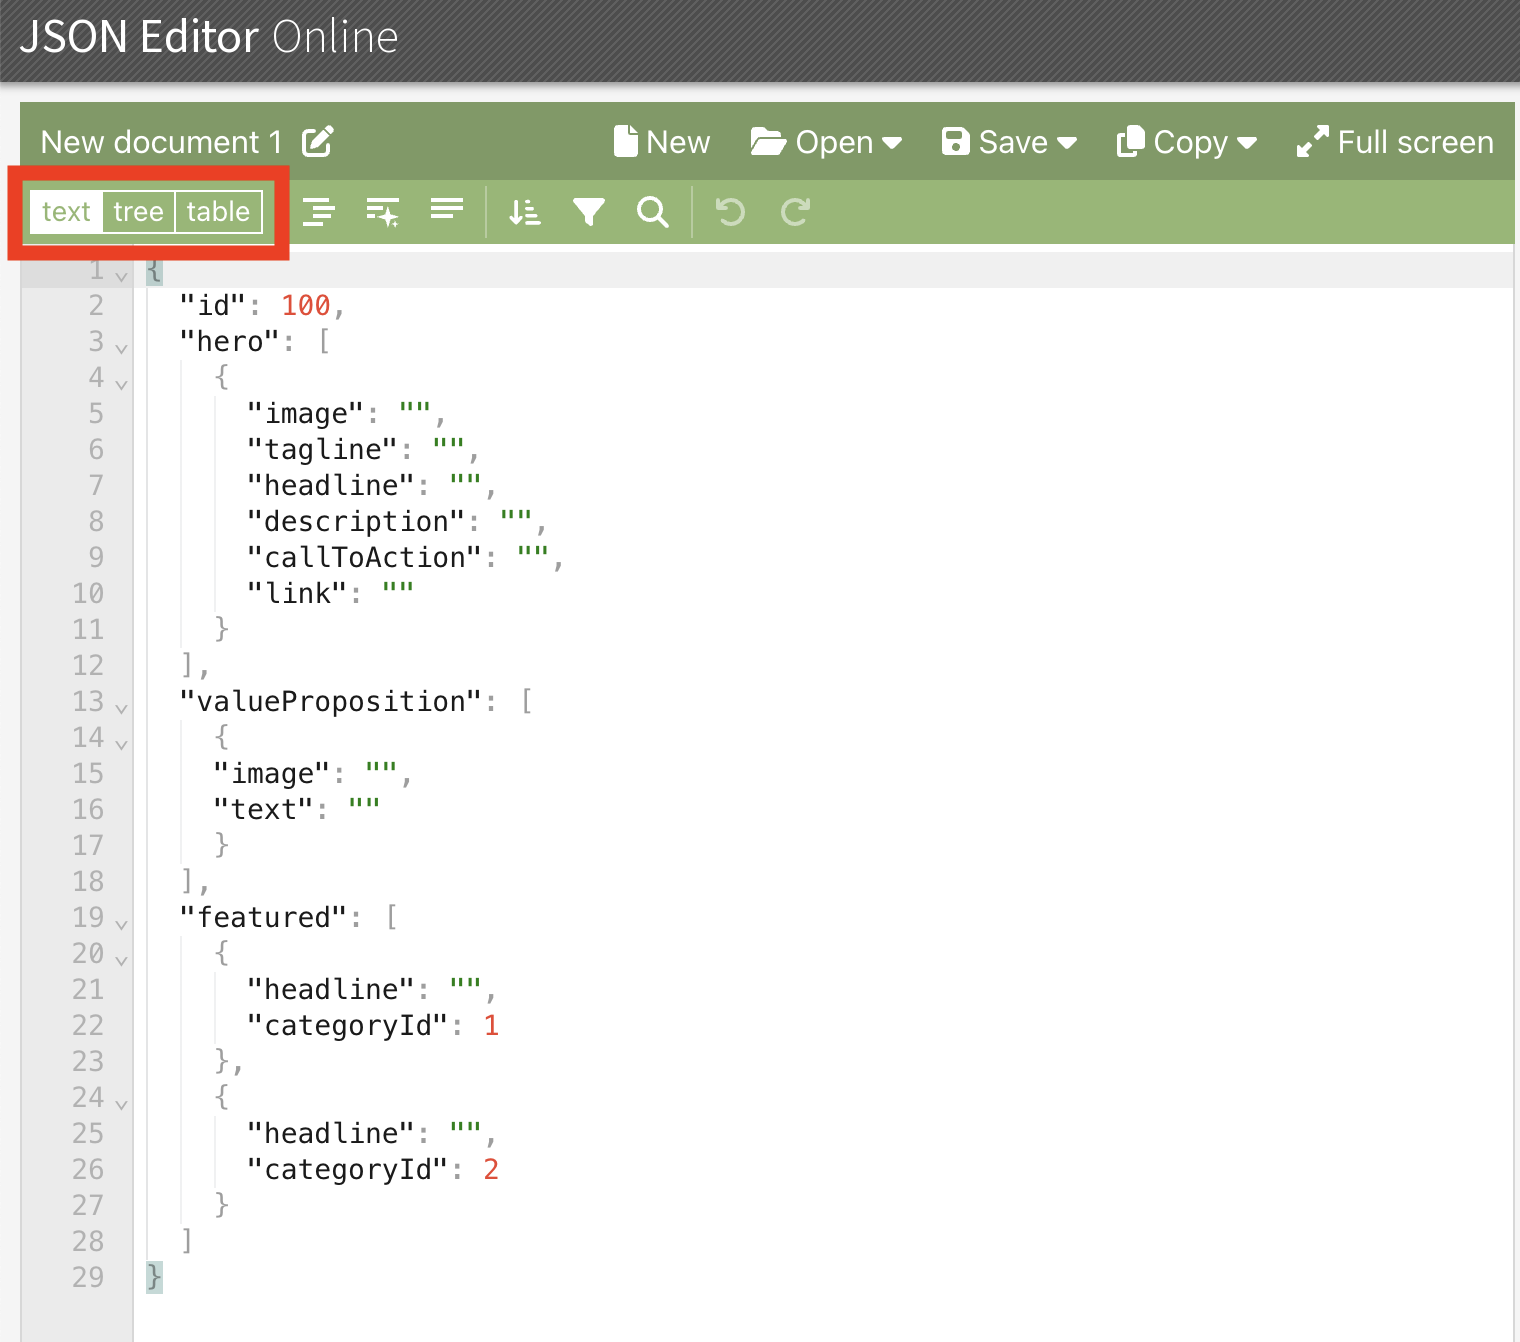
If you're new to JSON, you can find strong tool support online. This editor, for example, alerts you when there's a syntax problem. You can also use the tree view for safe editing.

Template
{
  "id": 100,
  "hero": [
    {
      "image": "",
      "tagline": "",
      "headline": "",
      "description": "",
      "callToAction": "",
      "link": ""
    }
  ],
  "valueProposition": [
    {
    "image": "",
    "text": ""
    }
  ],
  "featured": [
    {
      "headline": "",
      "categoryId": 1
    },
    {
      "headline": "",
      "categoryId": 2
    }
  ]
}
The id serves as identifier for the template as a whole. Don't modify it while filling in the other information.
The rest of this section describes the individual blocks.
Hero banner
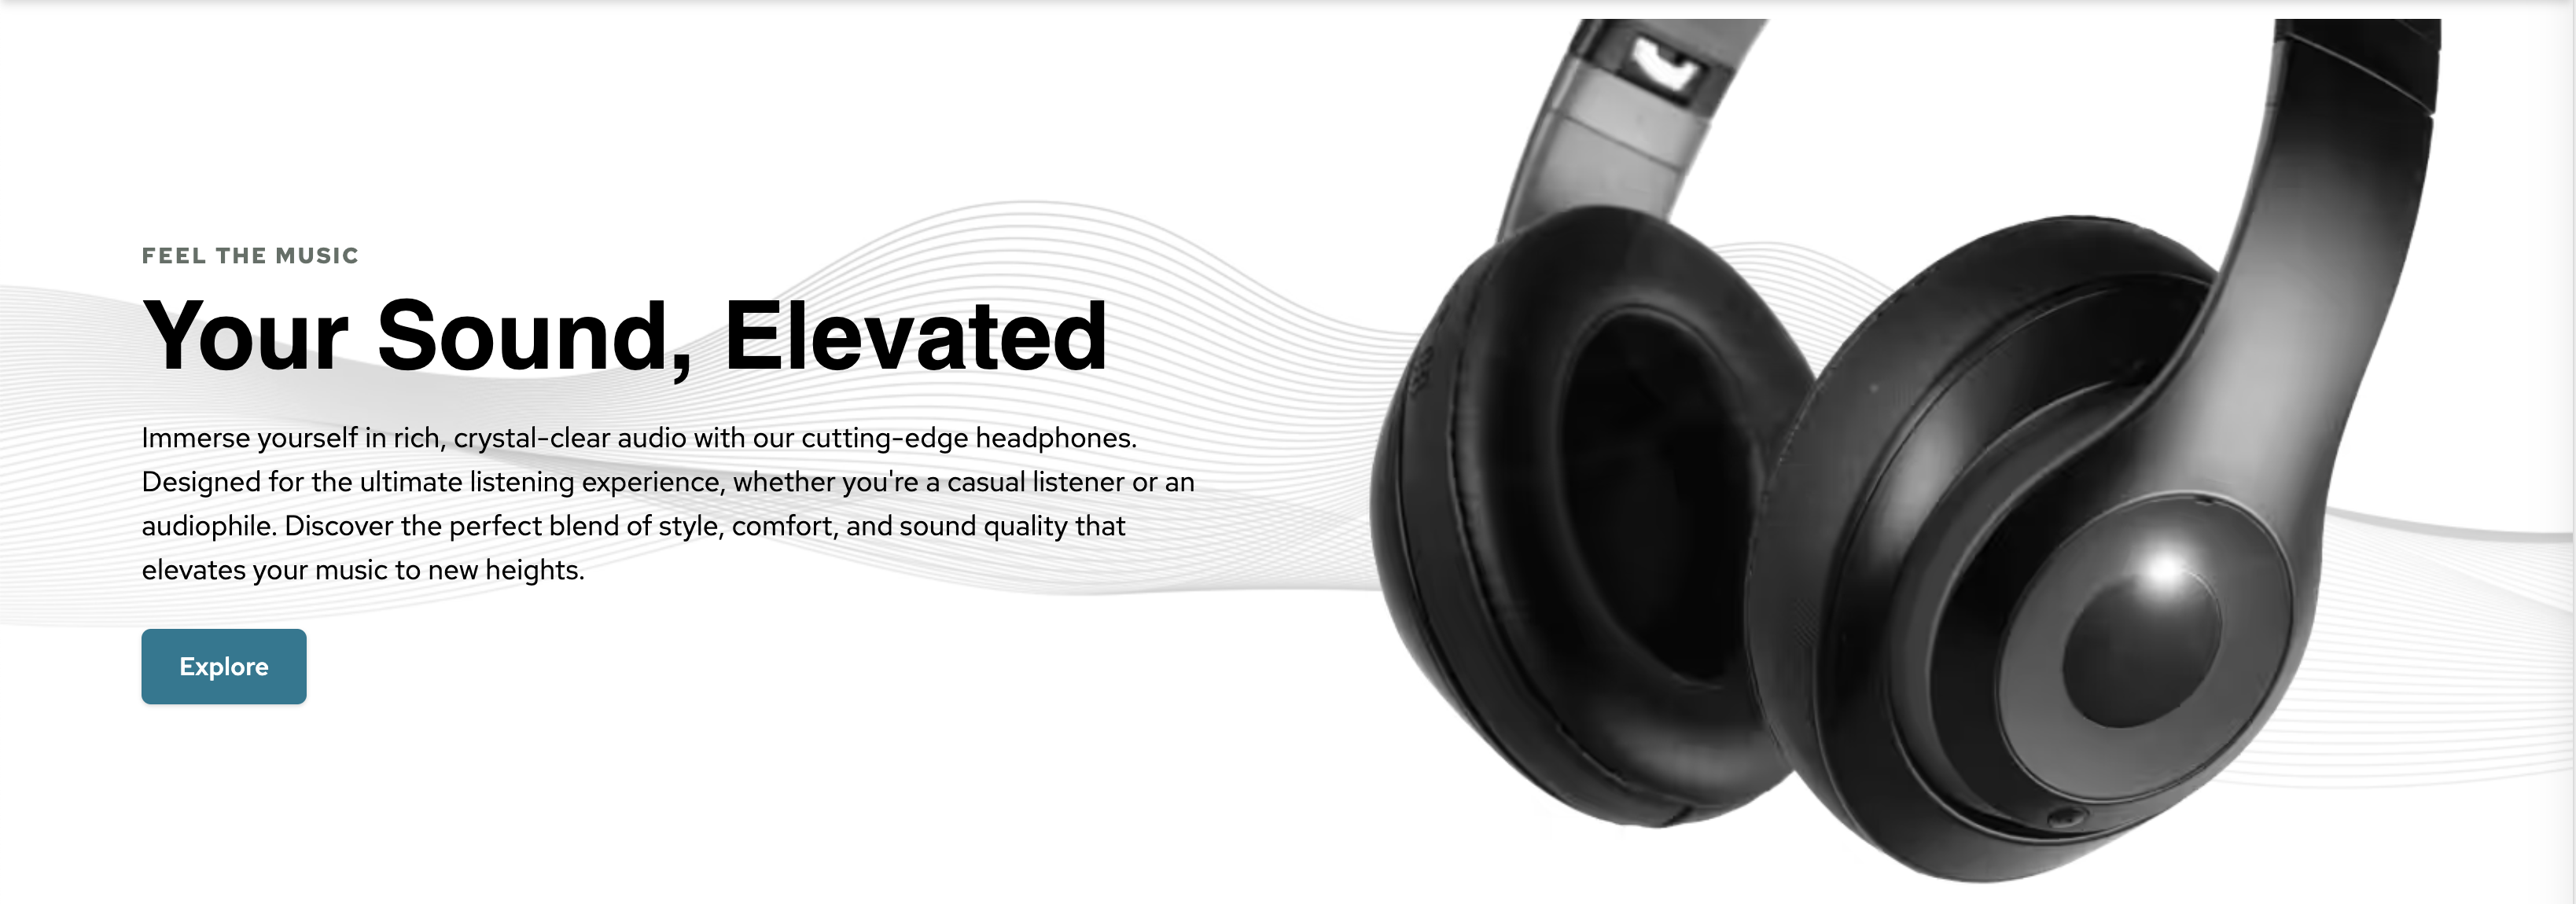
The hero banner puts the most important category in your shop front and center. Use this category to make a strong first impression on any visitor and let them know what your shop is all about.

To configure the category to promote this way, insert a block with the following structure in the hero section of your template.
{
  "image": "https://cdn02.plentymarkets.com/mevofvd5omld/frontend/homepage-hero-headphones.avif",
  "tagline": "Feel the music",
  "headline": "Your Sound, Elevated",
  "description": "Immerse yourself in rich, crystal-clear audio with our cutting-edge headphones. Designed for the ultimate listening experience, whether you're a casual listener or an audiophile. Discover the perfect blend of style, comfort, and sound quality that elevates your music to new heights.",
  "callToAction": "Explore",
  "link": "/headphones"
}| Key | Value |
|---|---|
image | Link to an image representative of the category, such as a representative product |
tagline | Slogan to advertise the category |
headline | Name of the category |
description | Description of the category |
callToAction | Text used for the button that opens the link |
link | The URL name of the category in the form /my-category |
Value proposition
This block allows you to introduce yourself to visitors and lay out what sets your shop apart. It consists of an image, a text block, or a combination of both. If you remove either element, the other will stretch across the full width of the container.

You can place the value proposition block any number of times. Blocks have to be separated by comma.
{
  "image": "https://cdn02.plentymarkets.com/mevofvd5omld/frontend/headphones-mediacard.avif",
  "alignment": "left",
  "text": "<div class='flex flex-col mt-5 sm:mt-20 mt-0 sm:p-0 p-5 text-center sm:text-left'><span class='text-xl font-bold mb-2'>Experience the Future of Sound</span><h2 class='text-2xl font-semibold mb-4'>Redefine Your Listening Experience</h2><p class='text-base mb-6 padding-right-desktop md:typography-text-lg'>Our latest collection of headphones is designed to deliver unparalleled audio precision, with deep bass, clear highs, and an immersive experience for every genre of music. Combining sleek design, comfort, and cutting-edge technology, these headphones are made for those who refuse to compromise on sound quality.</p><ul class='list-disc list-inside md:typography-text-lg'><li>Premium, studio-quality sound</li><li>Comfortable fit for extended listening</li><li>Long-lasting battery life</li><li>Seamless wireless connectivity</li></ul></div>"
}| Key | Value |
|---|---|
image | Link to an image that supports your value proposition. |
alignment | Determines the position of the image. By default, the image is displayed on the left side. |
text | Supports both regular text and HTML formatting. If you want to style elements, note that the shop uses TailwindCSS. So for example, instead of h1, you would apply class="text-2xl" to your element. If you're not familiar with Tailwind's class-based styling system, you can use Tailwind Play to preview your text block. |
Text block examples
This section contains example textblocks. You can use them as a starting point for the text property of the value proposition.
FAQ

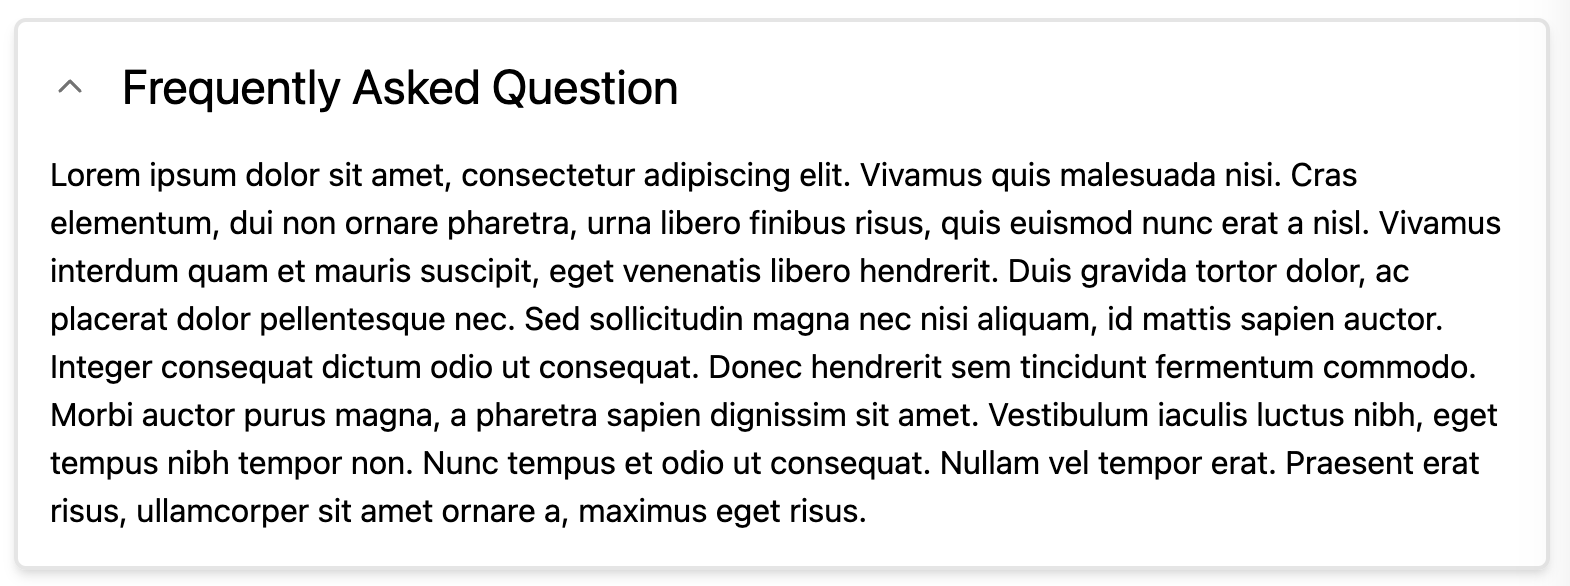
<div class="container mx-auto"><details class="border-2 border-solid border-neutral-200 rounded-md shadow-md p-4 [&_svg]:open:-rotate-180"><summary class="flex cursor-pointer list-none items-center gap-4"><div><svg class="rotate-0 transform text-neutral-500 transition-all duration-300" fill="none" height="20" width="20" stroke="currentColor" stroke-linecap="round" stroke-linejoin="round" stroke-width="2" viewBox="0 0 24 24"><polyline points="6 9 12 15 18 9"></polyline></svg></div><div class="text-2xl">Frequently Asked Question</div></summary><p class="mt-4">Lorem ipsum dolor sit amet, consectetur adipiscing elit. Vivamus quis malesuada nisi. Cras elementum, dui non ornare pharetra, urna libero finibus risus, quis euismod nunc erat a nisl. Vivamus interdum quam et mauris suscipit, eget venenatis libero hendrerit. Duis gravida tortor dolor, ac placerat dolor pellentesque nec. Sed sollicitudin magna nec nisi aliquam, id mattis sapien auctor. Integer consequat dictum odio ut consequat. Donec hendrerit sem tincidunt fermentum commodo. Morbi auctor purus magna, a pharetra sapien dignissim sit amet. Vestibulum iaculis luctus nibh, eget tempus nibh tempor non. Nunc tempus et odio ut consequat. Nullam vel tempor erat. Praesent erat risus, ullamcorper sit amet ornare a, maximus eget risus.</p></details></div>Featured categories
Featured categories show off the products of the provided category in a slider format. Each category is introduced via a headline.

You can promote as many categories this way as you want. For every category you want to promote this way, insert a block with the following structure in the featured section of your template. Blocks are separated by commas, as illustrated in the full template.
{
  "headline": "We recommend",
  "categoryId": 1
}| Key | Value |
|---|---|
headline | Text to introduce the category |
categoryId | ID of the category whose products to display |
TIP
Once you've set up your template for the first time, remember to complete the App configuration to connect your template to your shop.